Management within Groups: User Groups and Projects#
Introduction and Nomenclature#
Within B2ACCESS you can manage Groups by creating or removing subgroups, inviting or removing group members and granting or revoking administrative privileges.
Info
Groups can be subdivided hierarchically into sub-groups and sub-projects. For management of these, the following nomenclature will be used:
- Group: Groups subdivision units are called sub-groups.
- Groups can be organised hierarchical.
- Higher-level sub-groups always comprise all users from contained sub-groups. Therefore, removal of any user removes that user also from all contained sub-groups.
- Management of all sub-groups within a (sub-) project is performed by the same (set of) group manager(s).
They can delegate management, i.e. extend that set to further users.
- Sub-Project: This is a group with the specialty that group managers and sub-project admins can be defined separately.
- Administration of (sub-) projects is performed by project admins. They can create further sub-groups or sub-projects and delegate administration/management of these.
- Management of (sub-) projects can be performed by group manager(s). They may be allowed to create sub-groups. They can delegate management, i.e. extend the set of group managers for the given group and sub-group(s).
- Project, i.e. the top-level project, comprises all sub-projects and sub-groups. From group management point of view, it is thus identical with the Group.
Having a group in B2ACCESS AAI does not grant any quotas on connected services. Resources on connected services, which shall be accessible for group members, must be requested separately by the group manager(s) at the service provider(s).
The group management endpoint#
The group management is done within a dedicated endpoint /upman. You can browse directly to the endpoint or click on the icon in your userhome.

Info
The group management endpoint will only work if group management was delegated to your account, i.e. if you have been given sufficient privileges to manage the group. The icon in userhome will only be displayed in this case. Contact us if you think anything is wrong here.
The functionality of the group management is divided into four parts. These items are accessible from the navigation menu on the left-hand side:
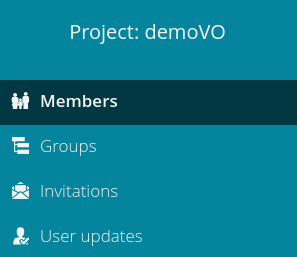
- In the tab ‘Members’, the group members are presented and permissions of the members can be changed.
- The group structure is found under ‘Groups’. It can be adapted there, too.
- New users can be invited into the group under ‘Invitations’.
- Join requests are listed in ‘User updates’.
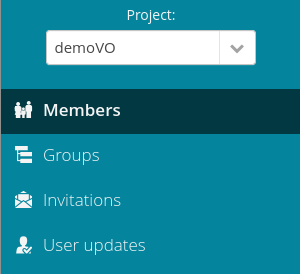
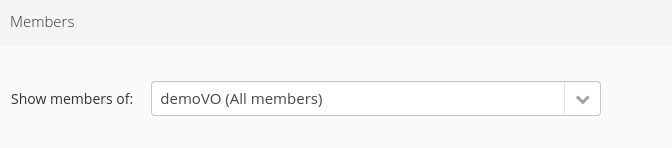
When you log into the group-management endpoint, you will always start in ‘Members’. With the drop-down-list on top of the navigation menu, you select the project you want to manage. If you have only management privileges for a single project, the list is not displayed.
Adding new users#
New users can be added to the groups in two ways:
- The first one is by an invitation from a group manager or project admin. In this case, the group manager or project admin creates an invitation which is send to the user via email. The group manager or project admin needs to know the email address only.
- The second option is a join request of the user him/herself. The group managers and project admins are notified about the new request via email and can review it.
Inviting new users#
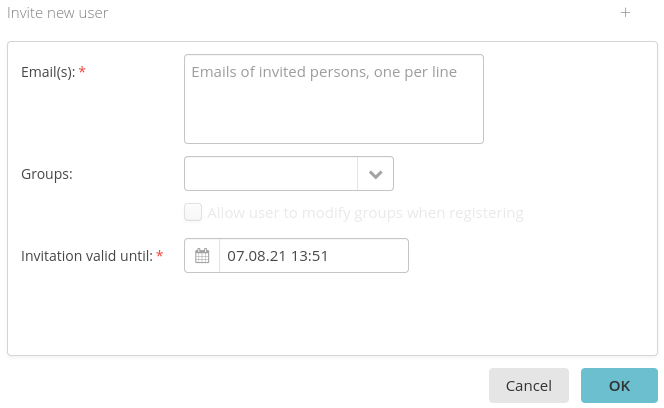
To invite new users, switch to ‘Invitations’ . Click on the button “New invitation” on top of the page to create a new invitation.

Enter the necessary information in the pop-up window. In most cases, this required only the email address(es) of the user(s) to be invited. You can supply multple addresses, one per line. You can limit the invitation to specific subgroups in the drop-down-list. If you do not limit the access, the new user(s) can select all subgroups during the registration. By default the invitation is valid for three days. You can change the invitation lifetime to your needs. If the new user missed the lifetime, you need to create a new invitation for them. Click OK to send the invitation.
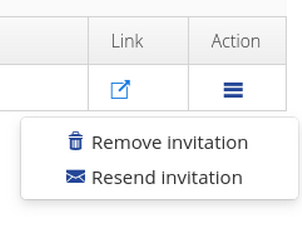
All pending invitations are added as a row in the table. In the case that a user has deleted the invitation accidentally, you can resend the invitation to him or her by selecting the option in the hamburger menu (three horizontal bars) under the column “Action”.
Handling join request#
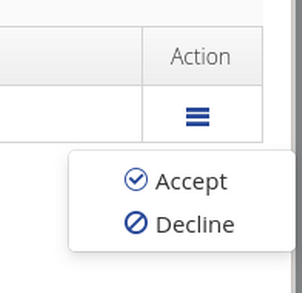
In case group membership subscription is offered to users, you have to handle the join requests of them. This is done in ‘Users updates’. The table displays all open requests from users. It contains the name and the email address of the user, who requested membership, the subgroups where the membership was requested and the time, when the request was submitted. You can accept or decline it in the hamburger menu (three horizontal bars) behind the user.
If you want to accept/decline multiple requests, you can select them with the checkbox and perform the operation with the hamburger menu above the user list.
Removing users#
In the ‘Members’ tab, you can remove users from the (sub-) project or group. The drop-down-list in the upper part of the window can be used to select the (sub-) group for which you want to review the group members.
You can choose whether to remove the user from the whole project or from the group you selected.
Warning
Removing a user from project or from the top level group will remove the user from the whole group. If you do this accidentally, you need to re-invite the user.
Remove from project#
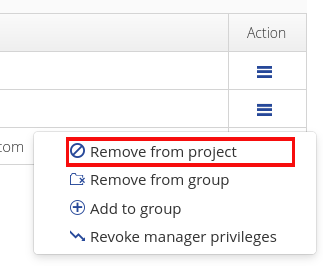
If you remove a user from the project, she or he will be removed from the whole group, independent in which subgroup the action was triggered. To remove a user, you need to click on the hamburger menu (three horizontal bars) behind the user you want to remove. In the pop-up menu you select “Remove from project”.
If you want to remove multiple users, you can select them with the checkbox and perform the operation with the hamburger menu above the user list.
Remove from group#
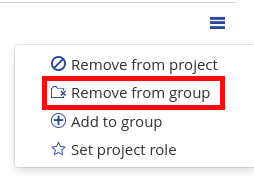
If you remove a user from group, she or he will be removed from the current group (in the hierarchy) and all subgroups of the current one, but kept in the upper group structure. If you perform this action in the root group, the user will be removed from the whole group structure and group. To remove a user, you need to click on the hamburger menu (three horizontal bars) behind the user you want to remove. In the pop-up menu you select “Remove from group”.
If you want to remove multiple users, you can select them with the checkbox and perform the operation with the hamburger menu above the user list.
Delegate user administration#
In the ‘Members’ tab you can delegate management privileges. The drop-down-list in the upper part of the window can be used to select the (sub)group for which you want to delegate group management.
To add or remove managing permission you need to click on the hamburger menu (three horizontal bars) behind the user you want to change the permission. In the pop-up menu you select “Set project role” and set the role in the pop-up menu.
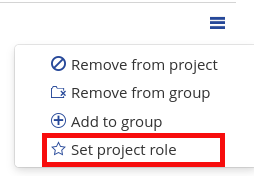
Possible role you can set are:
- Regular (user): This role has no capabilities in role-management and indicates the user as member of the group.
- Manager: This role entitles the user to invite/add/remove other users into/from the group, create/delete subgroups and grant or revoke manager privileges to other group members.
- Projects Admin: This role extends the capabilities of the Manager role to create subgroups as sub projects and delegate the management of this sub projects to third parties. While the user has the same role in all subgroups, the role in sub projects is encapsulated to other sub projects.
This option is only available if delegation of subgroup management is allowed in your project.
If you want to change the privileges of multiple users, you can select them with the checkbox and perform the operation with the hamburger menu above the user list.
The manager permission is valid for the whole (sub-)project including all sub-or parental groups, where it was granted.
The projects admin permission is valid for the whole (sub-)project including all sub-or parental groups, where it was granted. But this role has more capabilities and for this reason you can only set them in the root group of the (sub-)project.
Adding users to subgroups#
In case users shall be added to subgroups after they were invited or a subgroup was forgotten in the invitation, this can be done in the ‘Members’ tab. You need to click on the hamburger menu (three horizontal bars) behind the user. In the pop-up menu you select “Add to group”. In the pop-up window you select the group where the user is added. The user will be added to all parental groups of the selected subgroup.

If you want to add multiple users, you can select them with the checkbox and perform the operation with the hamburger menu above the user list.
Creating groups structure#
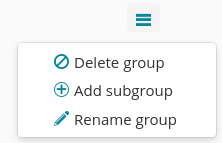
In case you want to create a structure within your group, you can create further subgroups. To create a subgroup, you need to switch to ‘Groups’. The tab shows the group structure with the hierarchical level of the groups. If you have created subgroups and only the main group is visible, you need to expand the structure with the triangle in front of the group name or in the hamburger menu (three horizontal bars) above. To add a subgroup you need to click on the hamburger menu of the group where you want to to create the subgroup. To delete a subgroup you need to click on the hamburger menu of the group you want to delete.
Delegating subgroup management#
To delegate the management of subgroups, you need to have the role “ProjectAdmin”, otherwise you do not have the privileges the perform this operation. If you have sufficient privileges, you can delegate the management during the creation of subgroups or for already existing groups.
Delegation for new subgroups#
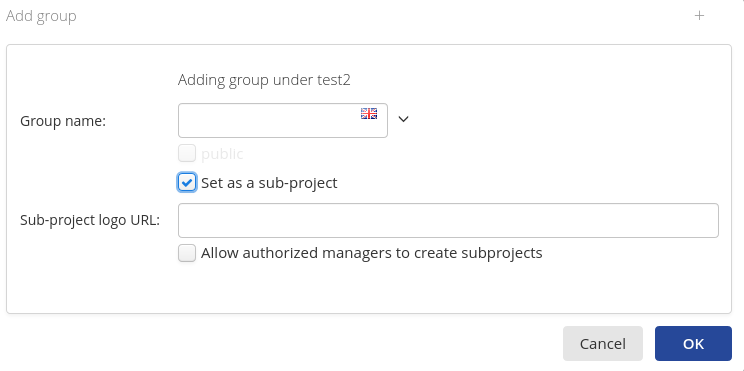
You can delegate the subgroup management during the creation of the subgroups. To enable the delegation you need to tick the checkbox “Set as a sub-project” in the subgroup creation pop up. You can also enter a URL to the logo of this group. If you want to allow to delegate the subgroup management in the new group too, you need to tick the checkbox “Allow authorized managers to create subprojects”. These three options are only visible to users with the “ProjectsAdmin” role. If you have only the “manager” role, those settings are not visible to you.
Delegation for existing groups#
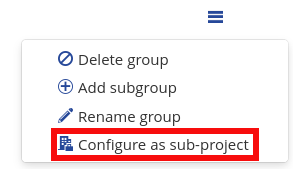
You can also enable the subgroup management delegation to already existing groups. In this case click on the hamburger menu of the group where you want to to enable this feature and click on ”Configure as a subproject”. The pop-up menu requests the same information, like in the case above.
In both cases you must add a user to the sub-project and grant him or her at least manager privileges. New users in the sub-project have the role “regular” by default. Subgroups which are configured as sub-projects are marked with a symbol containing a building and a briefcase.
Need help?#
Contact us if you need help with group management.
Last update: 09.11.2023
Last review: 20.02.2025